LAB 2 : INSTRUMENTATION
Lab 2 : INSTRUMENTATION
Objective
i
) To learn how to use the electrode to
determine the Ph meter.
ii) To use the micropipette with proper way.
iii)
To learn how to handle the microscope.
iv)
To look the shape from the slide under magnifications 4x, 10x, 40x and 100x .
Introduction
Most instrumental
methods of analysis are relative. Instruments register a signal due to some
physical or chemical property of the solution. For example, pH meters measure
the electrode potential which must be related to the [H+] or [OH-] of the
solution by comparison against known [H+] or [OH-] standard buffers. In other
words, the pH meter must be calibrated in order to obtain accurate results. A
standard procedure for calibrating pH meters is to prepare a linear working
curve known as a calibration curve by plotting the measured potential as a
function of pH or pOH. Many calibration descriptions in the literature are
rather confusion and misleading. This paper will discuss some basic concepts of
pH, pOH, pH glass electrodes, reference electrodes, standard buffers, and pH
meters. A micropipette is used to measure and dispense a specific volume of
liquid.
There are two different categories of
micropipettes: air displacement and positive displacement (4). Air displacement
is most commonly used for aqueous solutions, which was what was being measured
in this lab exercise. Both of these pipettes contain a piston which moves
inside of the chamber. The only difference is with air displacement, there was
still air separating the piston from the liquid and in positive displacement,
there was not (4). In this exercise, all of the pipettes measured in the form
of microliters.
Microscopes are an amazing invention; able to
observe specimens to the tiniest degree. No matter how small, we are able to
view an endless amount of life forms, all because of microscopic technology.
Scientists are opened to a whole new
world, things undiscovered, things never seenbefore. Now it is open to
everyone, In our very Biologi class, we are privileged to witness and it can
only make us learn through observation.
Materials and
apparatus
pH meter,distilled water, beaker, solution x, y, z and tissue
paper micropipette tip, microscope, slide of specimen and oil.
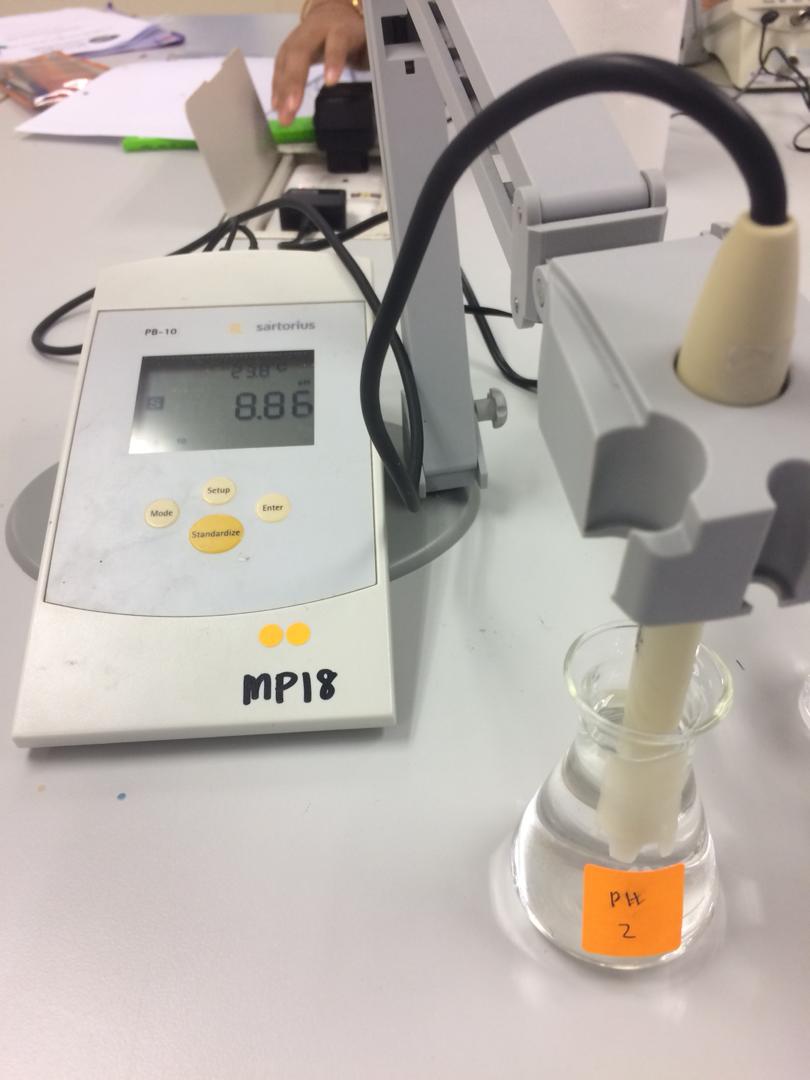
Calibration of pH
meter
Procedure
1. The protective and cover was removed
from the electrode.
2. The electrode was cleaned by
distilled water and then the excess water was wiped with tissue.
3. The Setup botton on pH meter was
pressed for a few times until the screen display the set of pH buffer that want
to be calibrated.( pH 4, 7, 10).
4. Standardize was pressed was waited
for a signal on the screen to place electrode into the first buffer (pH 4). The
calibration was started from lower to higher pH buffer.
5. The meter was recognised the buffer
and the first value was displayed. Then, the displayed indicates either good
electrode “OK” or electrode error “Error”.
6. Affter ok is displayed, the electrod
was taked out and rinsed with distilled water. The excess water was wiped with
tissue. Always make sure the electrode was rinsed with distilled water between
each measurement.
7. Standardize was pressed. The signal
on the screen was waited to place
electrode into the second buffer(pH 7). Same procedure was repeated until all
buffer have been standardize.
8. Once, the calibration is done, pH for
solution with label x, y, z was measured.
RESULT
What have you learnt?
|
What error(if
any)during handling did you observed?
|
x = 5.00
|
· Make sure the electrode must be
soak with distilled water to make sure that the microbe always in wet condition.
· Clean and wipe the electrode
carefully before using it to get an accurate pH value.
· Before testing the pH of a solution
we have to standardize the pH meter .
|
y = 7.01
 |
|
Z= 8.07
 |
Questions:
1.In your opinion, why it is necessary for all buffer
solution to be at the same temperature during calibration?
Buffer solution to be
at the same temperature during calibration because it is not consider the phosphate to be
involved in any redox reaction with the glss electrode.
2. MICROPIPETTE
METHODS:
1. Desire volume was set by turning the centrally located rings clockwise to
increase or counter clockwise to decrease volume.
2. Sterile tip was loaded. Use the proper size tip for each
pipette. The tip box to maintain sterility was closed. Do not allowedthe
pipette tip to touch any object.
3. The sample was loaded. At two different plunger positions when it depressed, the plunger will stop. The plunger was pushed down slowly to the point of first resistance : this is the load volume.
3. The sample was loaded. At two different plunger positions when it depressed, the plunger will stop. The plunger was pushed down slowly to the point of first resistance : this is the load volume.
4. Holding the plunger at the load volume set point, the tip
was putted into solution so that is is immersed just enough to cover the end( 3
- 4 mm).
5. The punger was released slowly to draw up the liquid and
keep the tip immersed.
6. The sample was delivered. The second stopping point was
found when the plunger depressed beyond the initial resistance. It contact with
the body of the pipette. The second stopping point was used for the complete
discharging o solutions from plastic tip. Not reach the second stop when
drawing liquid into the pipette, when expelling the last drop.
7. The tip was placed into the receiving vessel. The Pluger
was depressed all the way to the bottom to expel all the liquid.
8. Discharge slider was pressed on the back of the grip to
discharge the tip.
RESULT
What have you learnt ?
|
What error(if any)
during handling did you observed?
|
Micropipettes are used
to measure and deliver accurate volumes of liquid.
 |
o
Not Accounting for the Viscosity of a Sample.
o
Cleaning Irregularly.
|
Questions :
1.
Why
it is encourage to always select the smallest size micropipette that will
handle the volume you wish to move?
o
To
achieve the greatest accuracy. Accuracy decreases as use unnecessarily large
pipets for small volumes.
2.
Why
the liquids from the micropipette need to be release slowly, especially with
large volume pipettes?
o
This
prevent liquid from rushing into the end of the
micropipette and clogging it out.
3.
Why
the micropipette cannot be point up?
o This may caused liquid to run down
into the micropipett destroying it.
3. MICROSCOPE
METHODS :
1. A prepared slide was picked and was
observed under the microscope using different magnification.
2. Low power (4x) was used on the
microscope to locate the specimen on the prepared slide. The shapes were drawn.
3. The high power carefully switched
after you have centered the specimen you are viewed in the center of the field.
4. The procedure was repeated using
higher magnficaations up to 100x magnification.
5. The shapes under microscope sing 4x,
10x, 40x and 100x magnifications.
RESULT
What have you learnt?
|
What error(if any?
During handling did you observed?
|
To see the slide deeper with different
magnifications.

4x

10x

40x

100x
|
Adjust both the focus
knob until get the clearer image.
|
Discussion
Based from this experiment, it basically teaches us how to
use lab instruments properly. Example of the lab intrument are pH meter,
micropipette and microscope. Before conducting an experiment, we have to know
how to use these instrument so that we can get a better result. Most
importantly, we have to get the idea of handling it with care to make it last
longer and avoid it to be broken, as the instruments are very expensive.
The first
experiment that we have learn is the pH meter. It is necessary to understand
the mechanism correctly as it helps to point out remedy errors and teaches us
to calibrate the pH meter. From this, we learnt that the microbe below the
electrode is so sensitive that it needs to be wet everytime before or after
using. We used distilled water to soak the electrode. We also need to clean and
wipe the electrode carefully before testing the pH meter. For some reason, if
we do not manage to follow this steps, it will effect our reading.
Next is
micropipette. We know that it tip has vary in size, so make sure you pick the
right size for each micropipette. To dispense the solution, we have to release
it slowly as this will help to prevent the liquid to clogging it up. Bare in
mind to always use new tip for each different solution.
Lastly, a
microscope. This instrument help us to see a specimen deeper with different
magnification which are 4x, 10x, 40x and 100x. Each magnification give a
different view as the higher magnification gives clearer and details image.
Make sure to use lower magnification which is 4x to locate the specimen on the
right position. In addition, to use 100x, a drop of oil is needed to put on the
specimen. Carefull to not let the 40x magnification to touch this oil, as this
will make the microscope disfunction properly.
Conclusion
To conclude, basically this experiment teaches us how to use
and handle the instrument properly. if we obey the steps of using the
instrument properly, we will get a better result. This will also lead to long term
of instruments to be used, and also will save cost by avoiding it to be broken.
i) Ying, L. R. (2016, August 31). Lab Report: Calibration and Determination pH Value Using pH Meter. Retrieved from https://ying2notebook.wordpress.com/2016/08/31/calibration-and-determination-ph-value-using-ph-meter/
ii) Impact of Pipetting Technique. (n.d.). Retrieved from https://www.artel-usa.com/resource-library/impact-of-pipetting-technique/
Ying, L. R. (2016, August 31). Lab Report: Calibration and Determination pH Value Using pH Meter. Retrieved from https://ying2notebook.wordpress.com/2016/08/31/calibration-and-determination-ph-value-using-ph-meter/
iii) Retrieved from https://www.coursehero.com/file/21240341/Experiment-1-Microscope/


Comments
Post a Comment